Checkout Standard
Checkout Standard provides a simplified and secure flow for collecting payments from customers. It's easy to integrate.
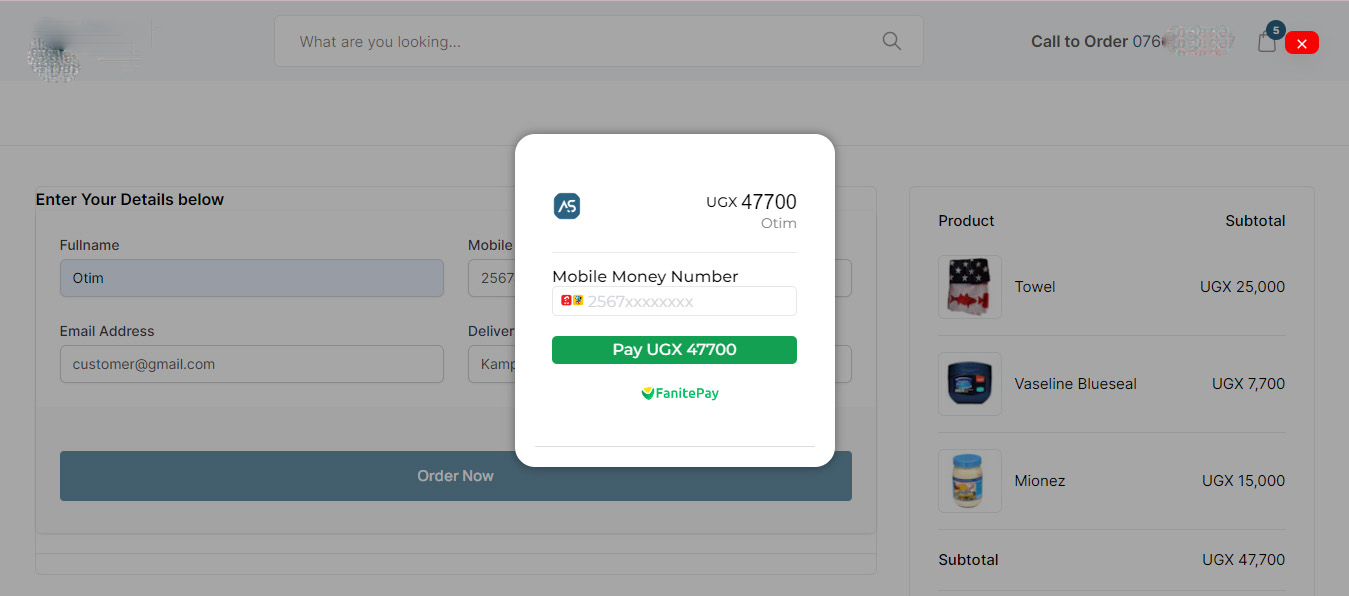
The check-out standard option can be integrated such that your application displays our payment modal allowing your customers to complete their transactions by entering their payment information.
Get Started
1. Collect Payment Details
To initiate the transaction, you’ll need to provide essential details including the customer’s email, first name, last name, transaction amount, reference, and any other pertinent information required for processing.
Request parameters for the payment endpoint.
| Field | Data type | Required | Description |
|---|---|---|---|
| amount | integer | Required | The amount to charge the customer. |
| currency | string | Required | The currency in which the customer should be charged. Options supported currently is only [UGX] |
| name | string | Required | The name of the customer |
| string | Required | The email of the customer | |
| phone | string | Required | The mobile number of the customer |
| meta | string | Required | JSON object containing any information you’d want to send to FanitePay in this object. |
| redirectUrl | string | Optional | The URL to redirect your customer when the transaction is complete. |
Once you’ve gathered all the required payment information, you’ll need to send a POST request to our create checkout endpoint. This request will include the details you’ve collected, allowing us to initiate the checkout process.
HTML:
<form id="payment-form"> <div class="form-group"> <label for="name"> Name</label> <input type="text" id="name" required /> </div> <div class="form-group"> <label for="email">Email Address</label> <input type="email" id="email" required /> </div> <div class="form-group"> <label for="phoneNumber">Phone Number</label> <input type="number" id="phone" required /> </div> <div class="form-group"> <label for="amount">Amount</label> <input type="tel" id="amount" required /> </div> <div class="form-submit"> <button type="submit" id="submit-button"> Pay Now</button> </div></form><script src="https://unpkg.com/@fanitepay/checkout@2.2.0/dist/inline.min.js"></script>Note : The FanitePay inline javascript is included using a script tag. This is how you import FanitePay Checkout into your code. The Pay button has been tied to an onClick function called payFanitePay. This is the action that causes the FanitePay popup to load.
2. Initiate Payment
When you have all of the information needed to begin the transaction, you must connect it to the javascript function that sends it to FanitePay and displays the checkout popup modal.
Endpoint:
const paymentForm = document.getElementById('payment-form');     paymentForm.addEventListener("submit", payFanitePay, false);function payFanitePay(e) {     e.preventDefault();       FanitePay.initialize({         key: "FNTPSECK_TEST-*************",         amount: parseInt(document.getElementById("amount").value),         currency: "UGX",         name: document.getElementById("name").value,        email: document.getElementById("email").value,        phoneNumber: document.getElementById("phone").value,
         onClose: function () {           alert("Transaction was not completed, window closed.");         },         onSuccess: function (data) {           const reference = data.reference;    alert("Payment complete! Reference: " + reference);         },       });     }
Checkout Popup Modal: